Age Range: 7+
Time to Complete: 25 minutes
Supplies Needed
Pencil
Eraser
A round lid or object for perfect circles, or this printable template


1. Draw 6 large circles on a sheet of paper. Make sure to give each circle some space as they should not be touching. You can also download and print this template we have prepared for you!
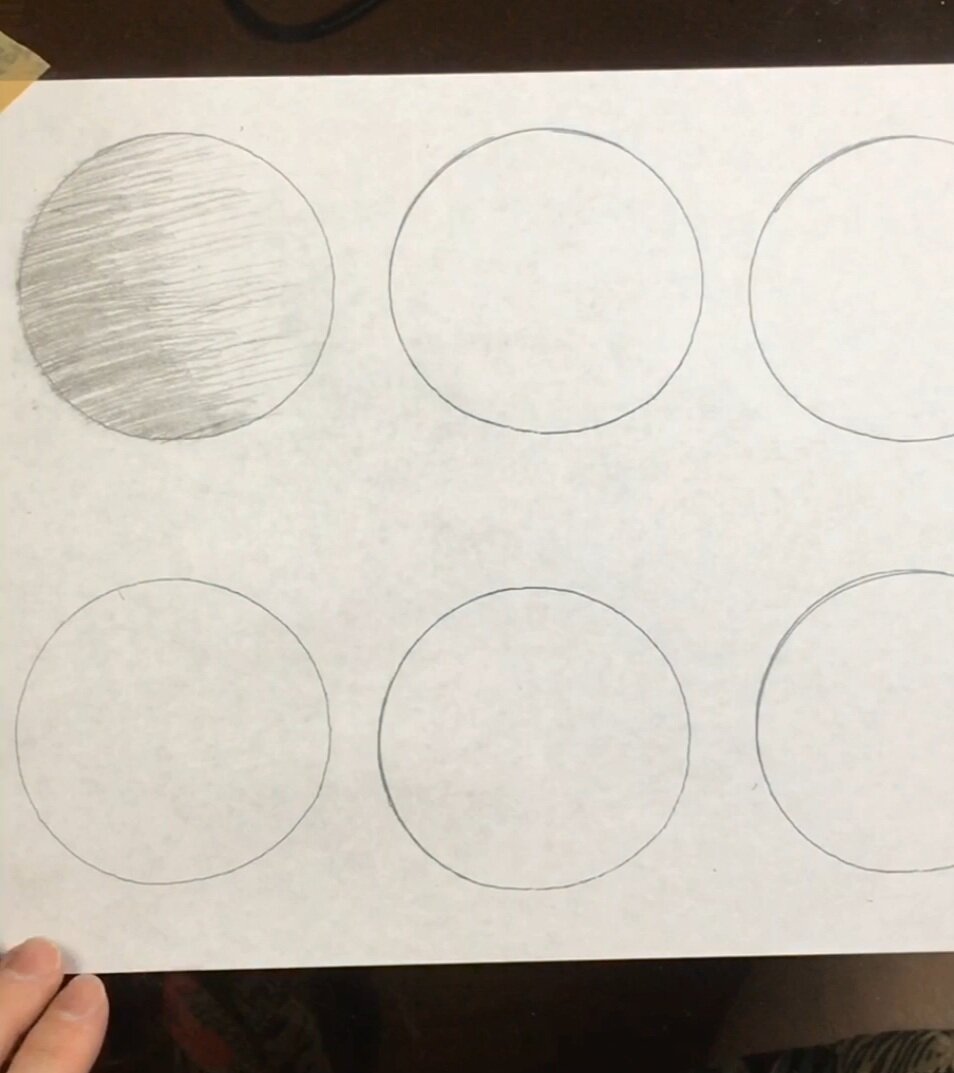
2. In your first circle, begin by lightly drawing horizontal lines or hatching from the left side of the circle to a little past the middle. Continue doing this, adding continuously shorter horizontal lines along the left side of your circle. When you feel that the circle is well shaded, stop and erase any stray marks.
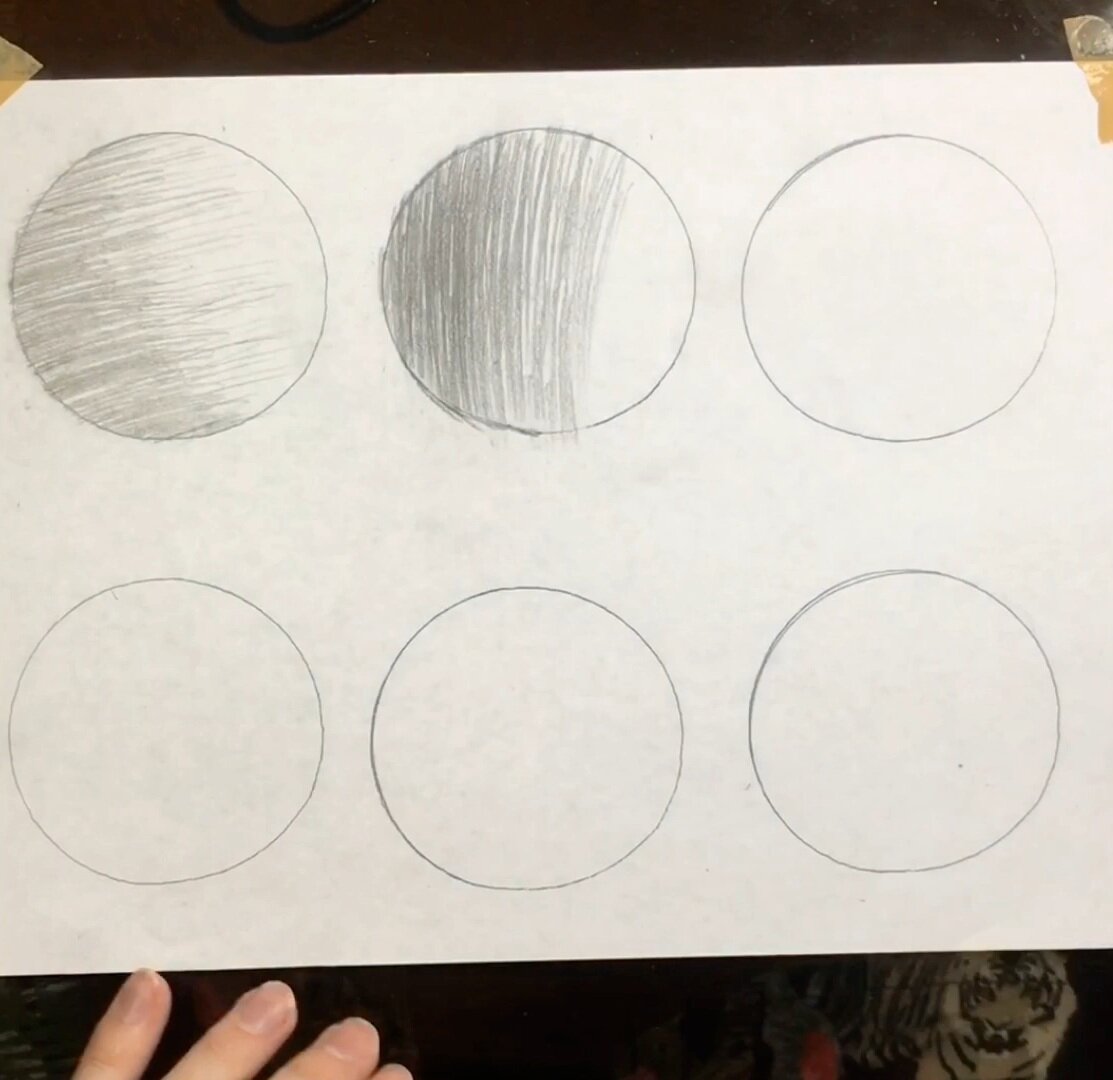
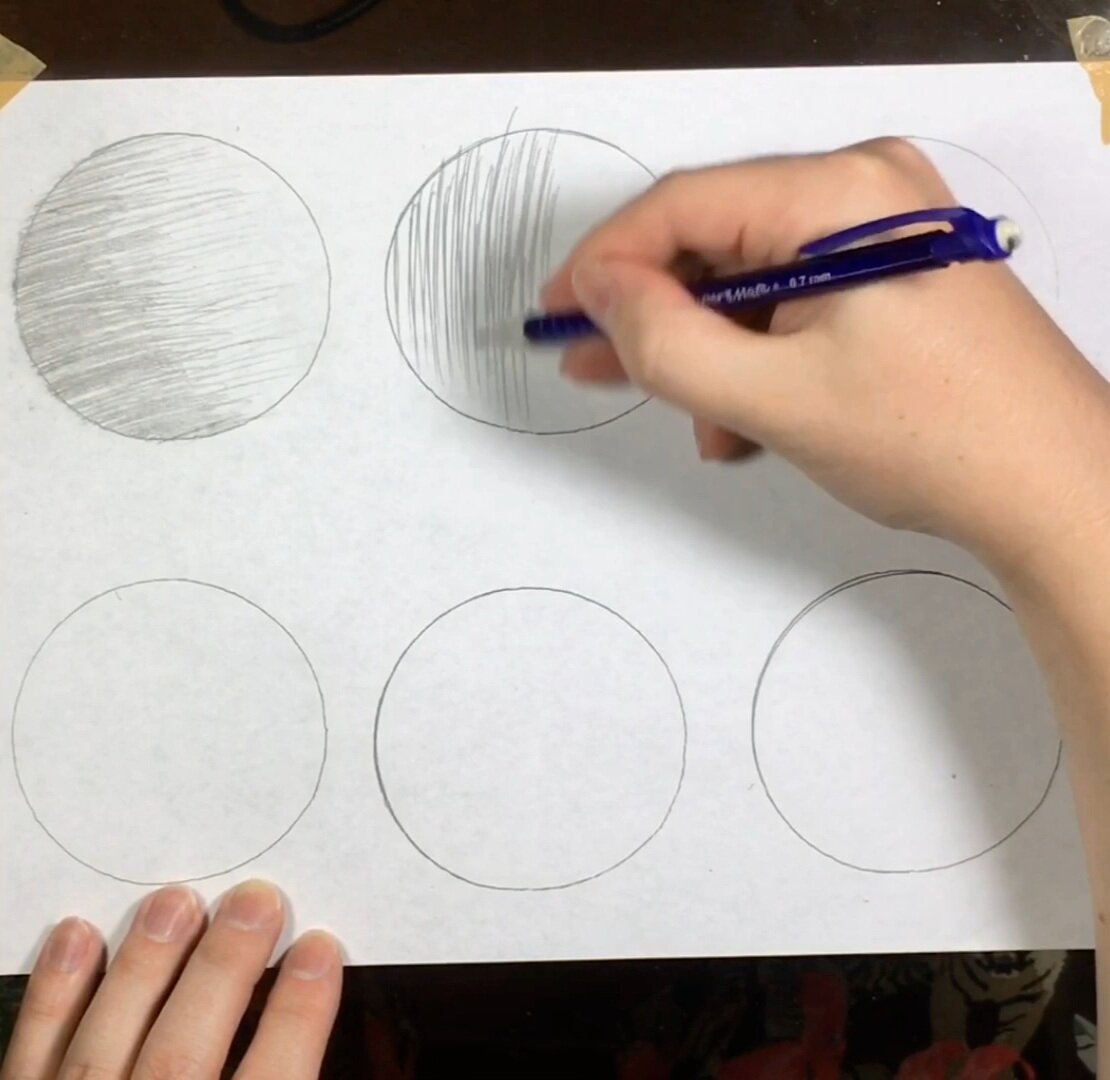
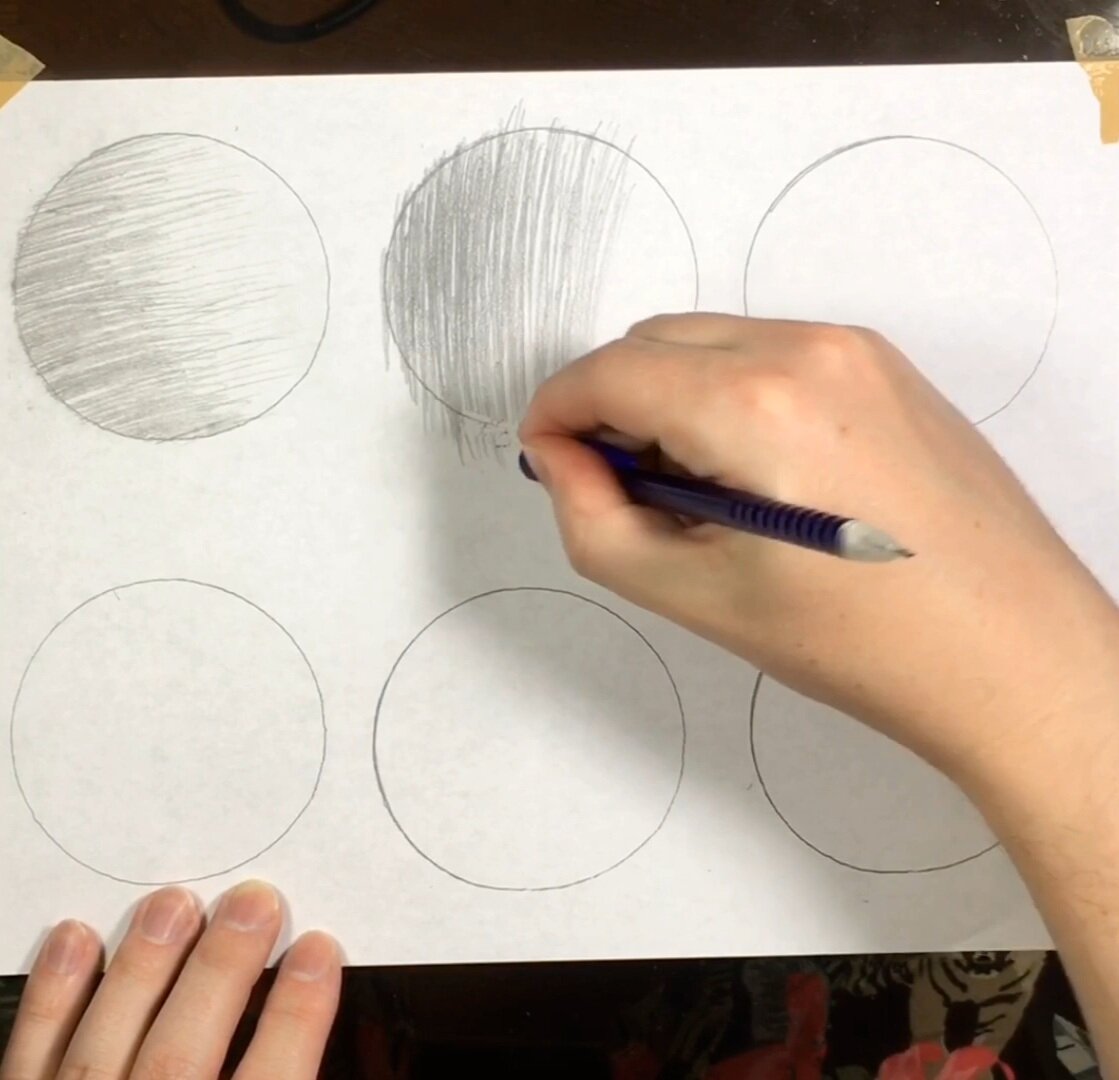
3. In your second circle, begin by lightly drawing vertical lines or hatching from the left side of the circle to a little past the middle. Continue doing this, adding continuously more lines closer to the left side of your circle. When you feel that the circle is well shaded, stop and erase any stray marks.
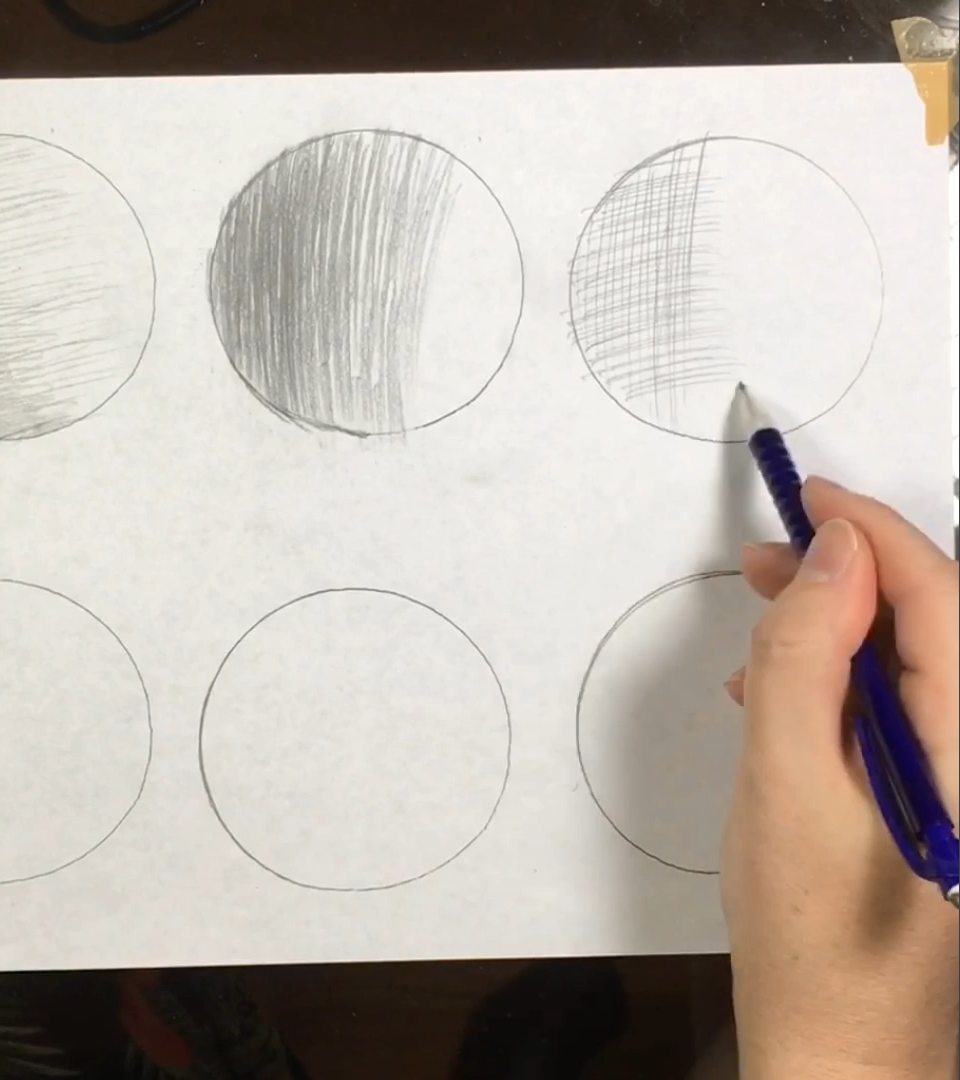
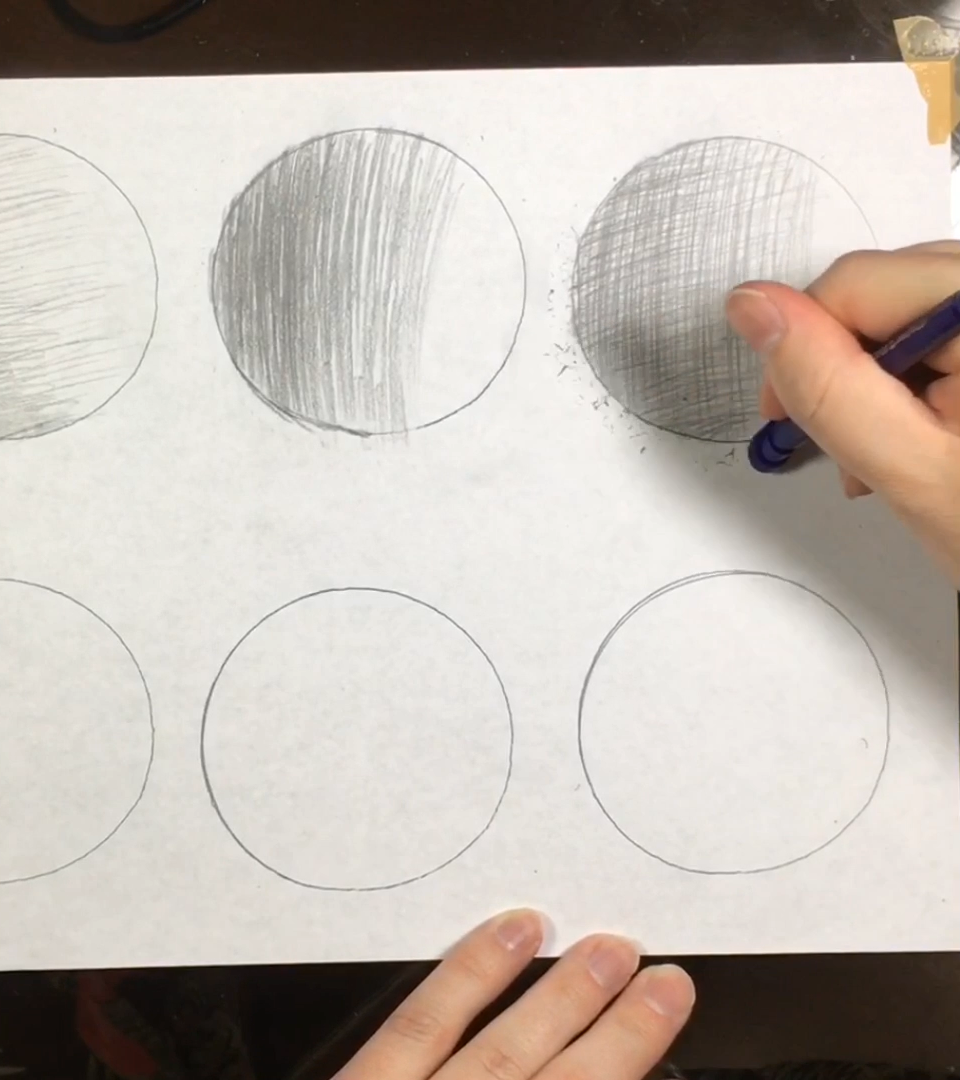
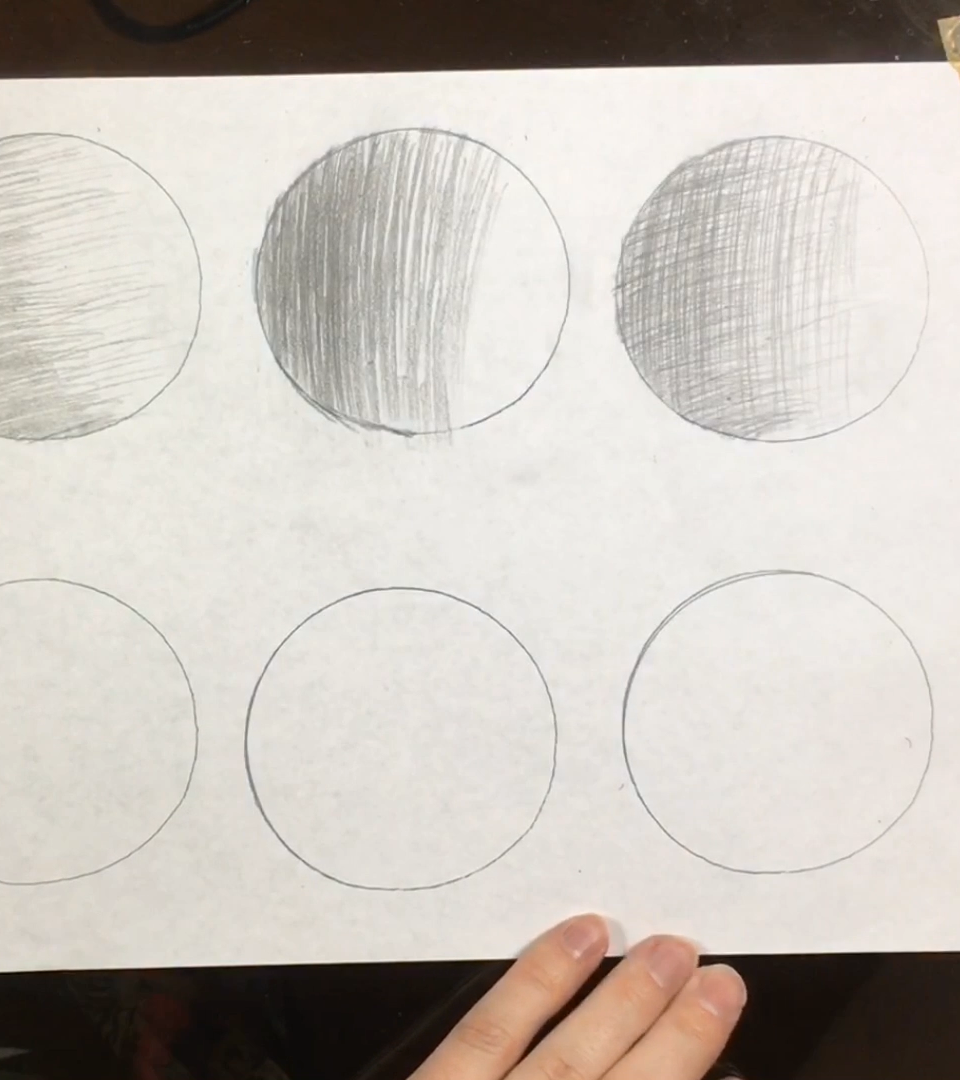
4. Crosshatching: In your third circle, begin by lightly drawing horizontal lines or hatching from the left side of the circle to a little past the middle. Continue doing this, adding continuously shorter horizontal lines along the left side of your circle. Then, add vertical lines to the areas where horizontal lines exist. These should be added more densely closer to the left side of the circle. When you feel that the circle is well shaded, stop and erase any stray marks.

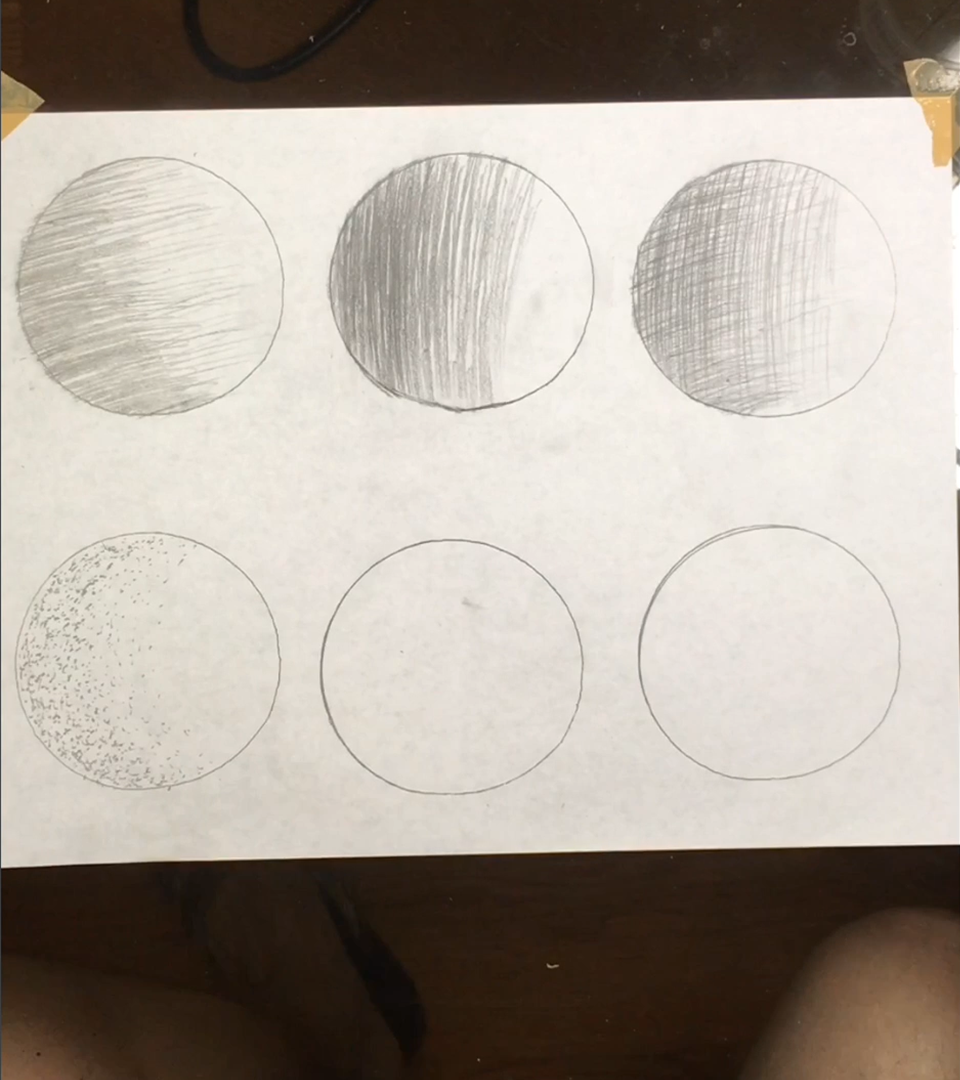
5. In your fourth circle, begin by lightly adding a spread of small dots extending from the left side of the circle to a little past the middle. Continue adding dots in this area. The left side of the circle should have a denser layer of dots that lightens as it extends towards the right side. When you feel that the circle is well shaded, stop and erase any stray marks.
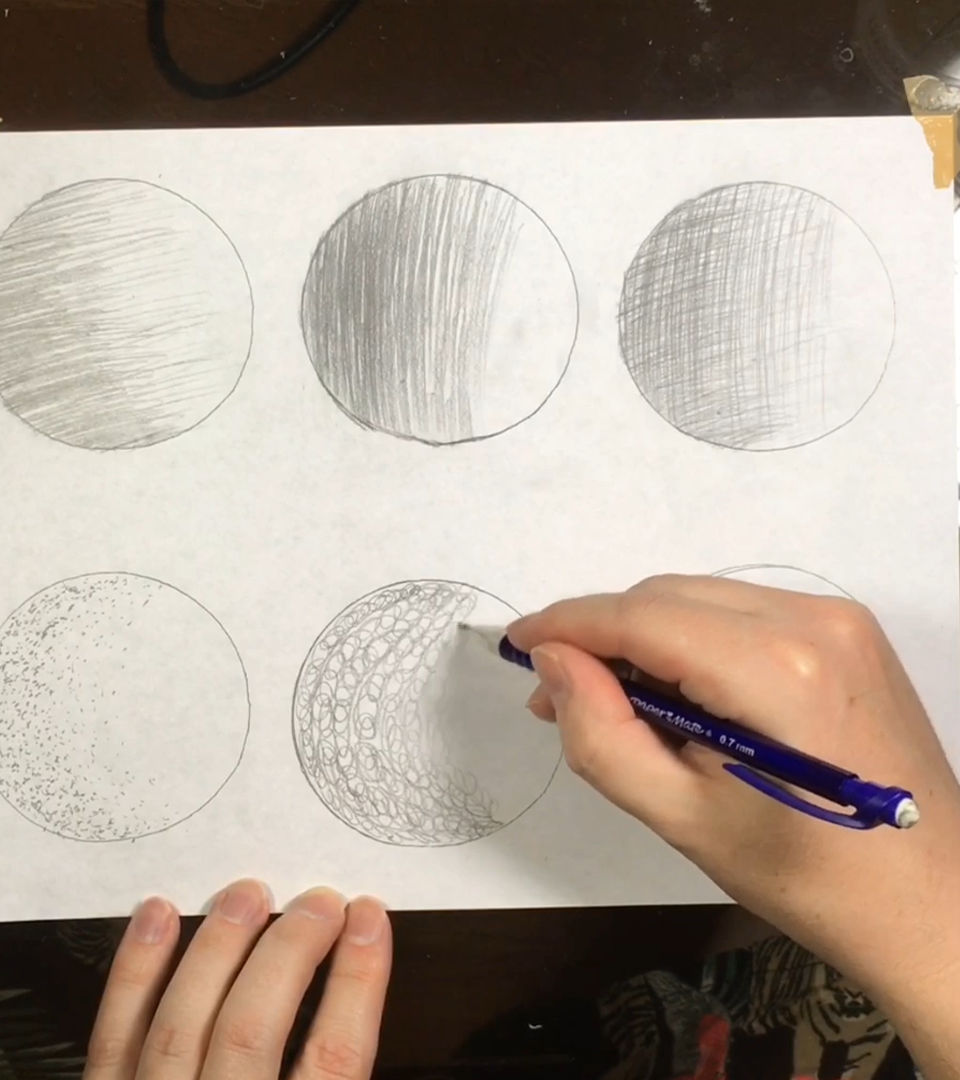
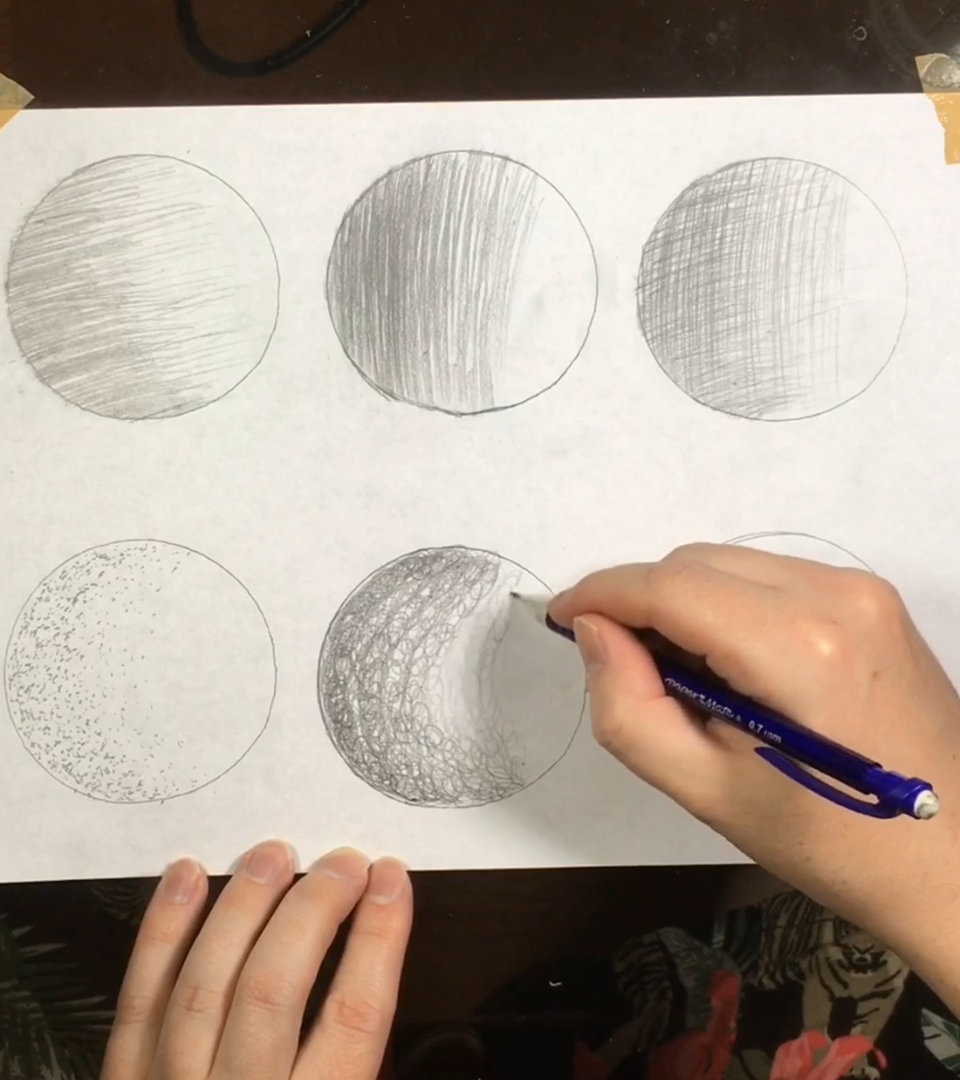
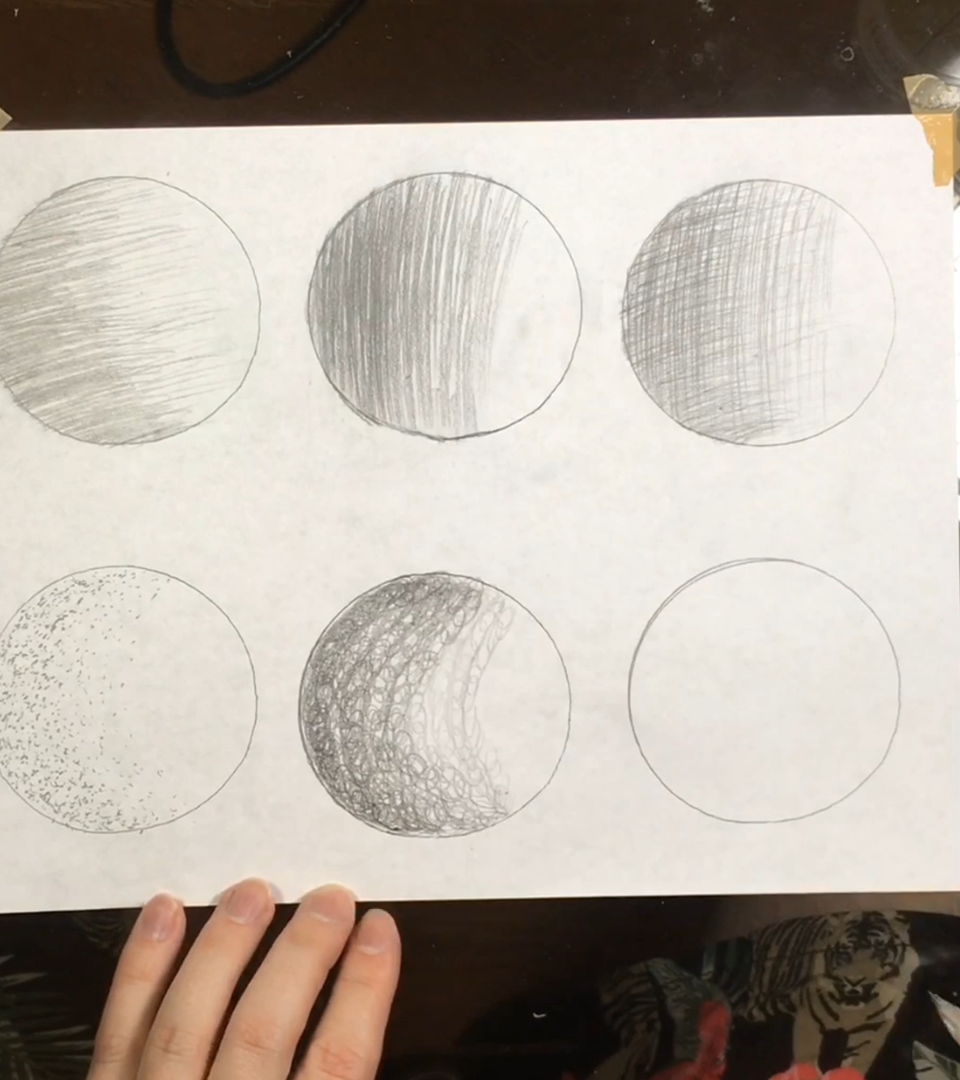
6. In your fifth circle, starting at the top middle, begin by lightly drawing concentric loops, or scumbling, along the left side of your circle. Continue to draw these loops so that they lightly cover about half of your circle, extending towards the left side. Add more layers of loops beginning at the left hand side but stopping a short distance from the edge of the loops you initially drew. Continue adding layers of loops until your circle looks well shaded. Erase any stray marks you may have made.
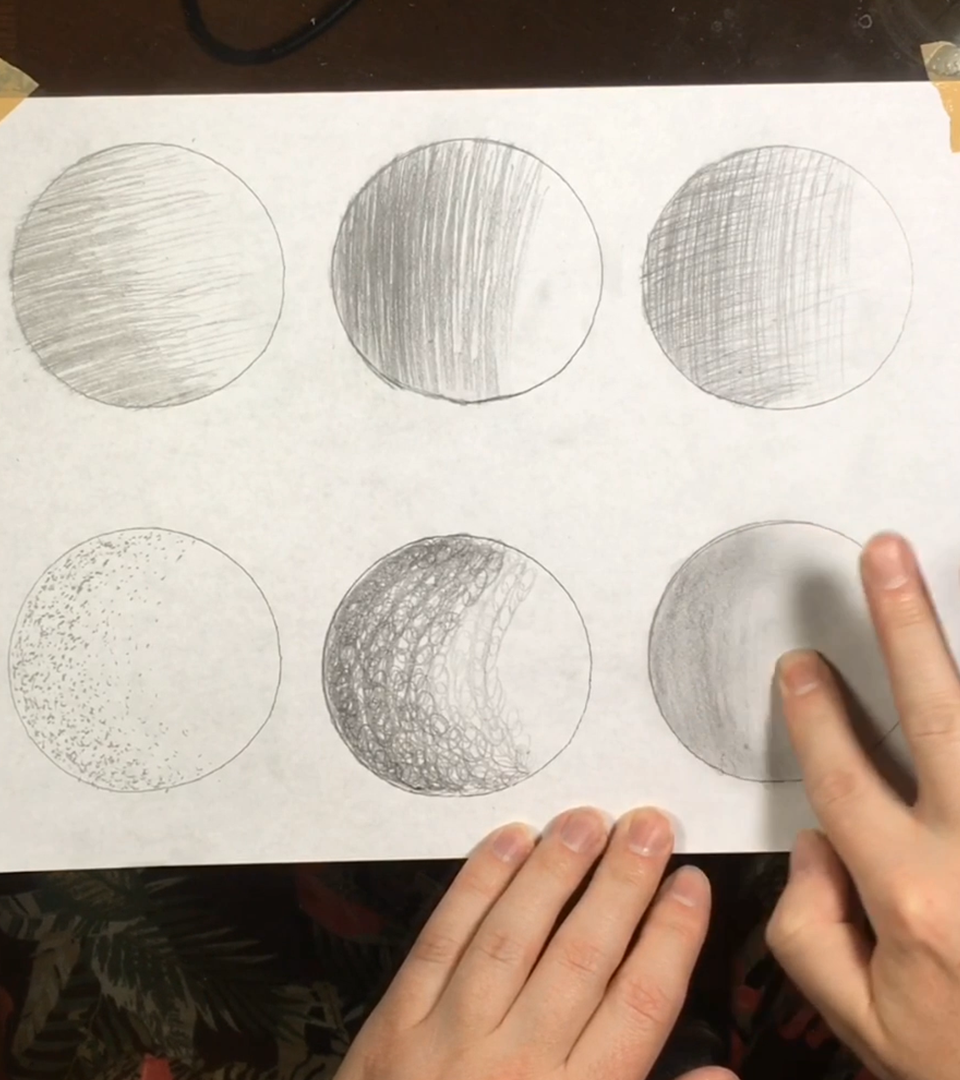
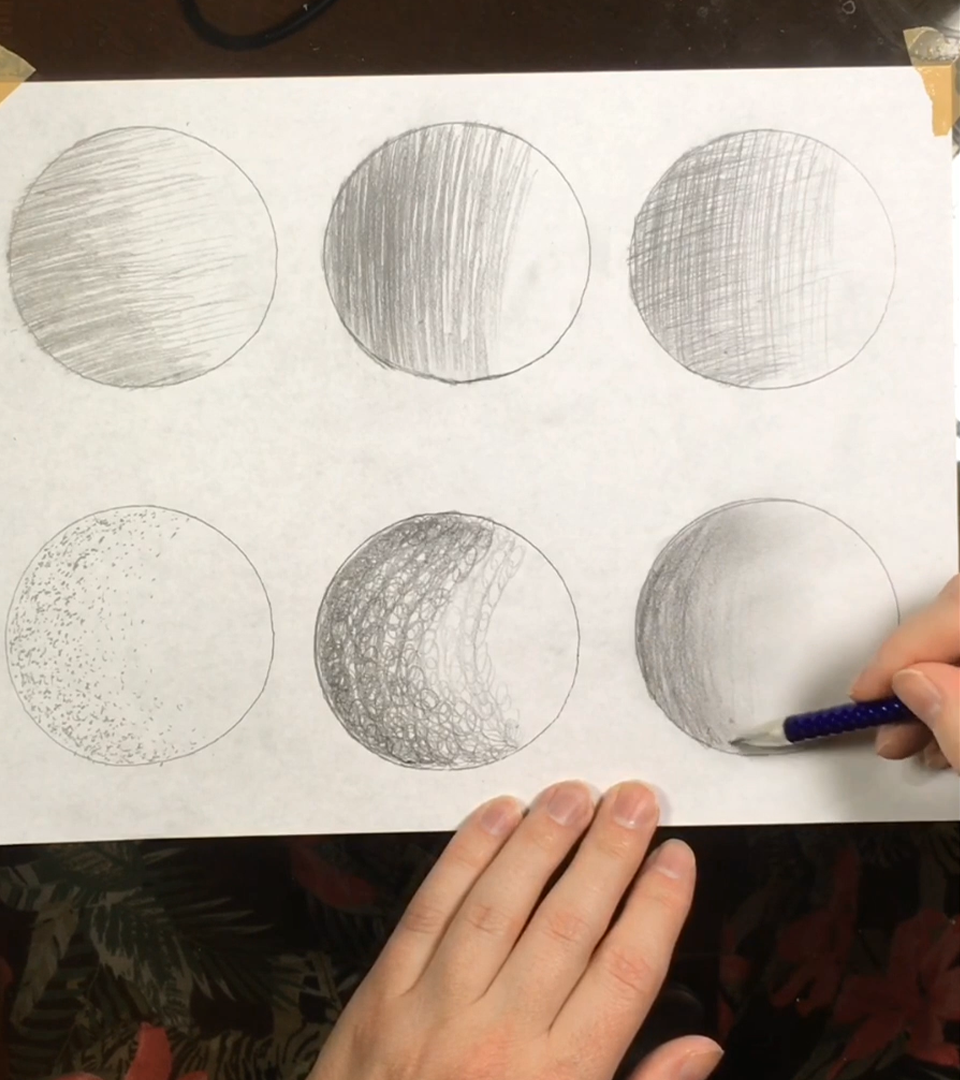
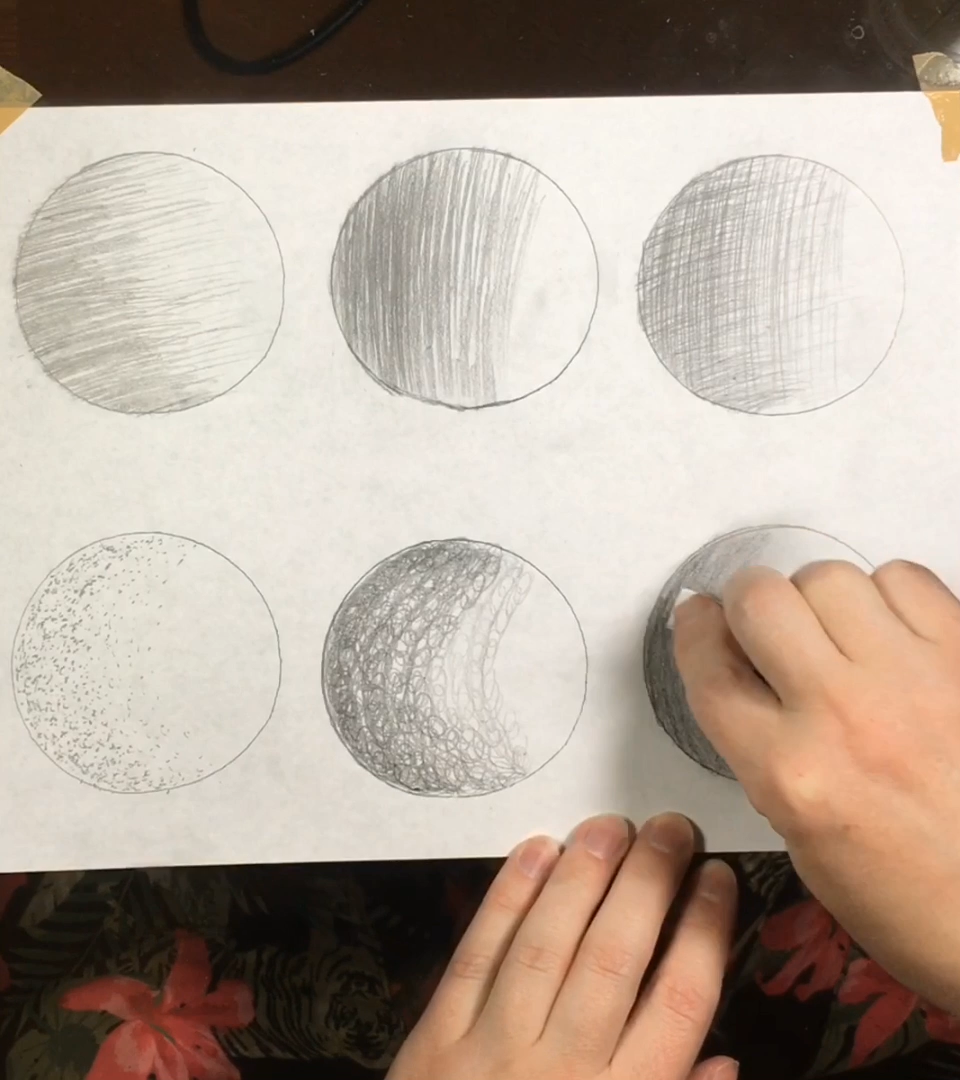
7. Begin by adding a light layer of graphite to the left half of your sixth circle. Using your finger or a smudge stick, smear the graphite towards the right side of your circle. Continue to add more layers of graphite and smudging in this manner until you are satisfied with the shading. Erase any additional smudge marks that may be outside your circle.
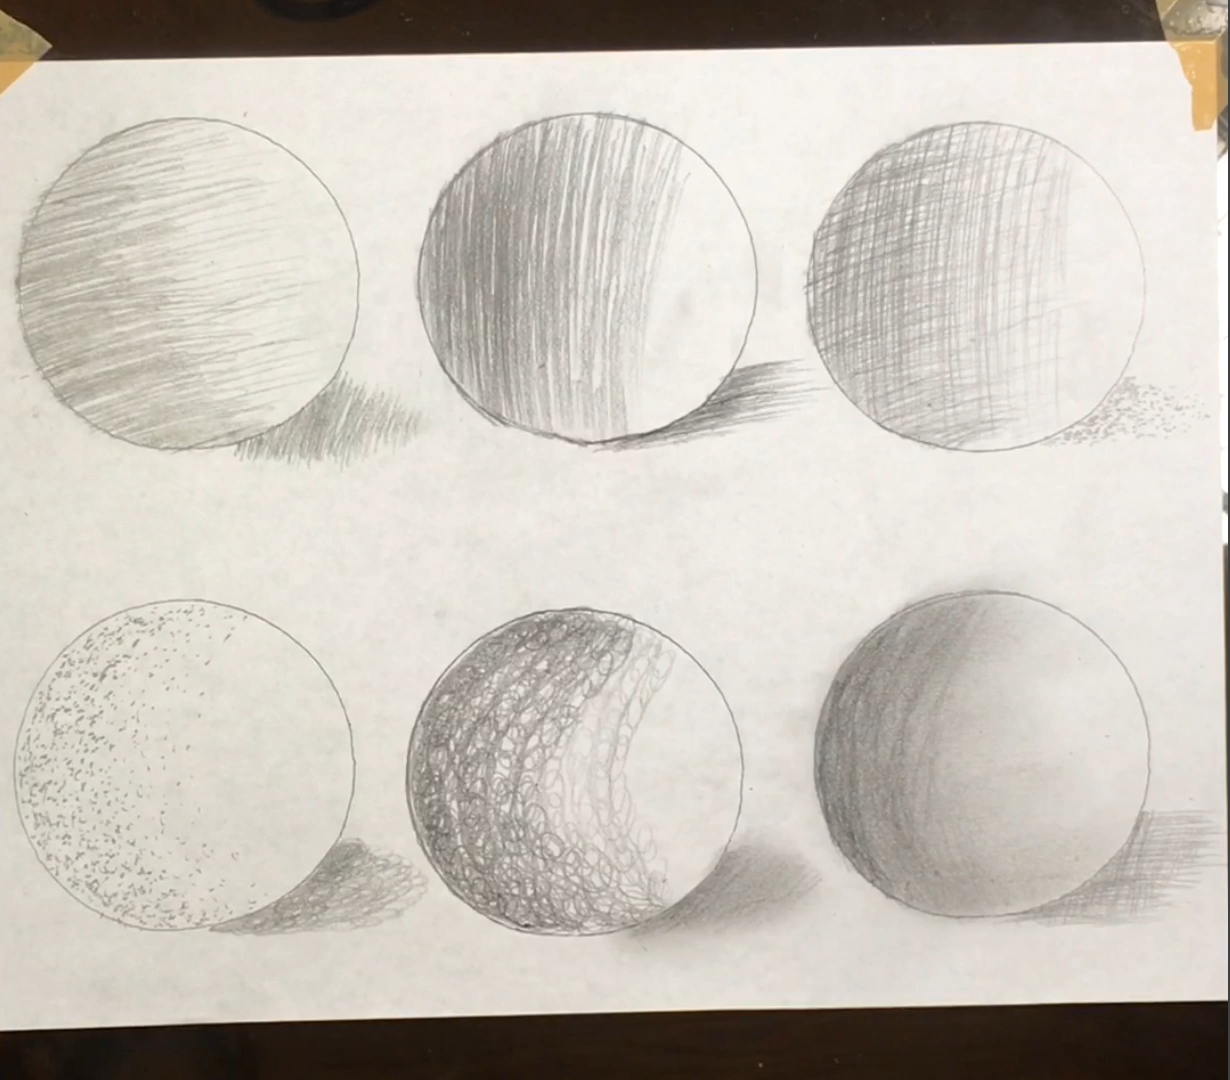
8. Underneath each of our circles, add shading of a different type then what exists within that particular circle. For example, add horizontal hatching underneath the vertical hatched circle. This shading should extend from the bottom of our circle towards the left side of your paper (the opposite side as pictured) as this is where a shadow would exist based on the light source we imagined.
Next steps:
Practice these types of shading while drawing different objects. Get creative with your shading and textures!

When lines are drawn closely together and at the same angle, this is called a hatch. Hatches can go in any direction and angle. Most artists begin with horizontal or vertical hatches.

Hatches can be layered at different angles to create a crosshatch. Crosshatching can make an area darker by adding different angles.

Sippling describes the use of dots or marks to make an area darker. Areas are darkened by increasing the number of dots.
Scumbling describes using circular motions to make an area darker. Similar to scribbling, scumbling usually has the artist picking up their pencil or pen.