Age Range: 2+
Time to Complete: 15 minutes
Supplies Needed
Tin foil, 12 x 12 square
Marker
Ruler
Scissors
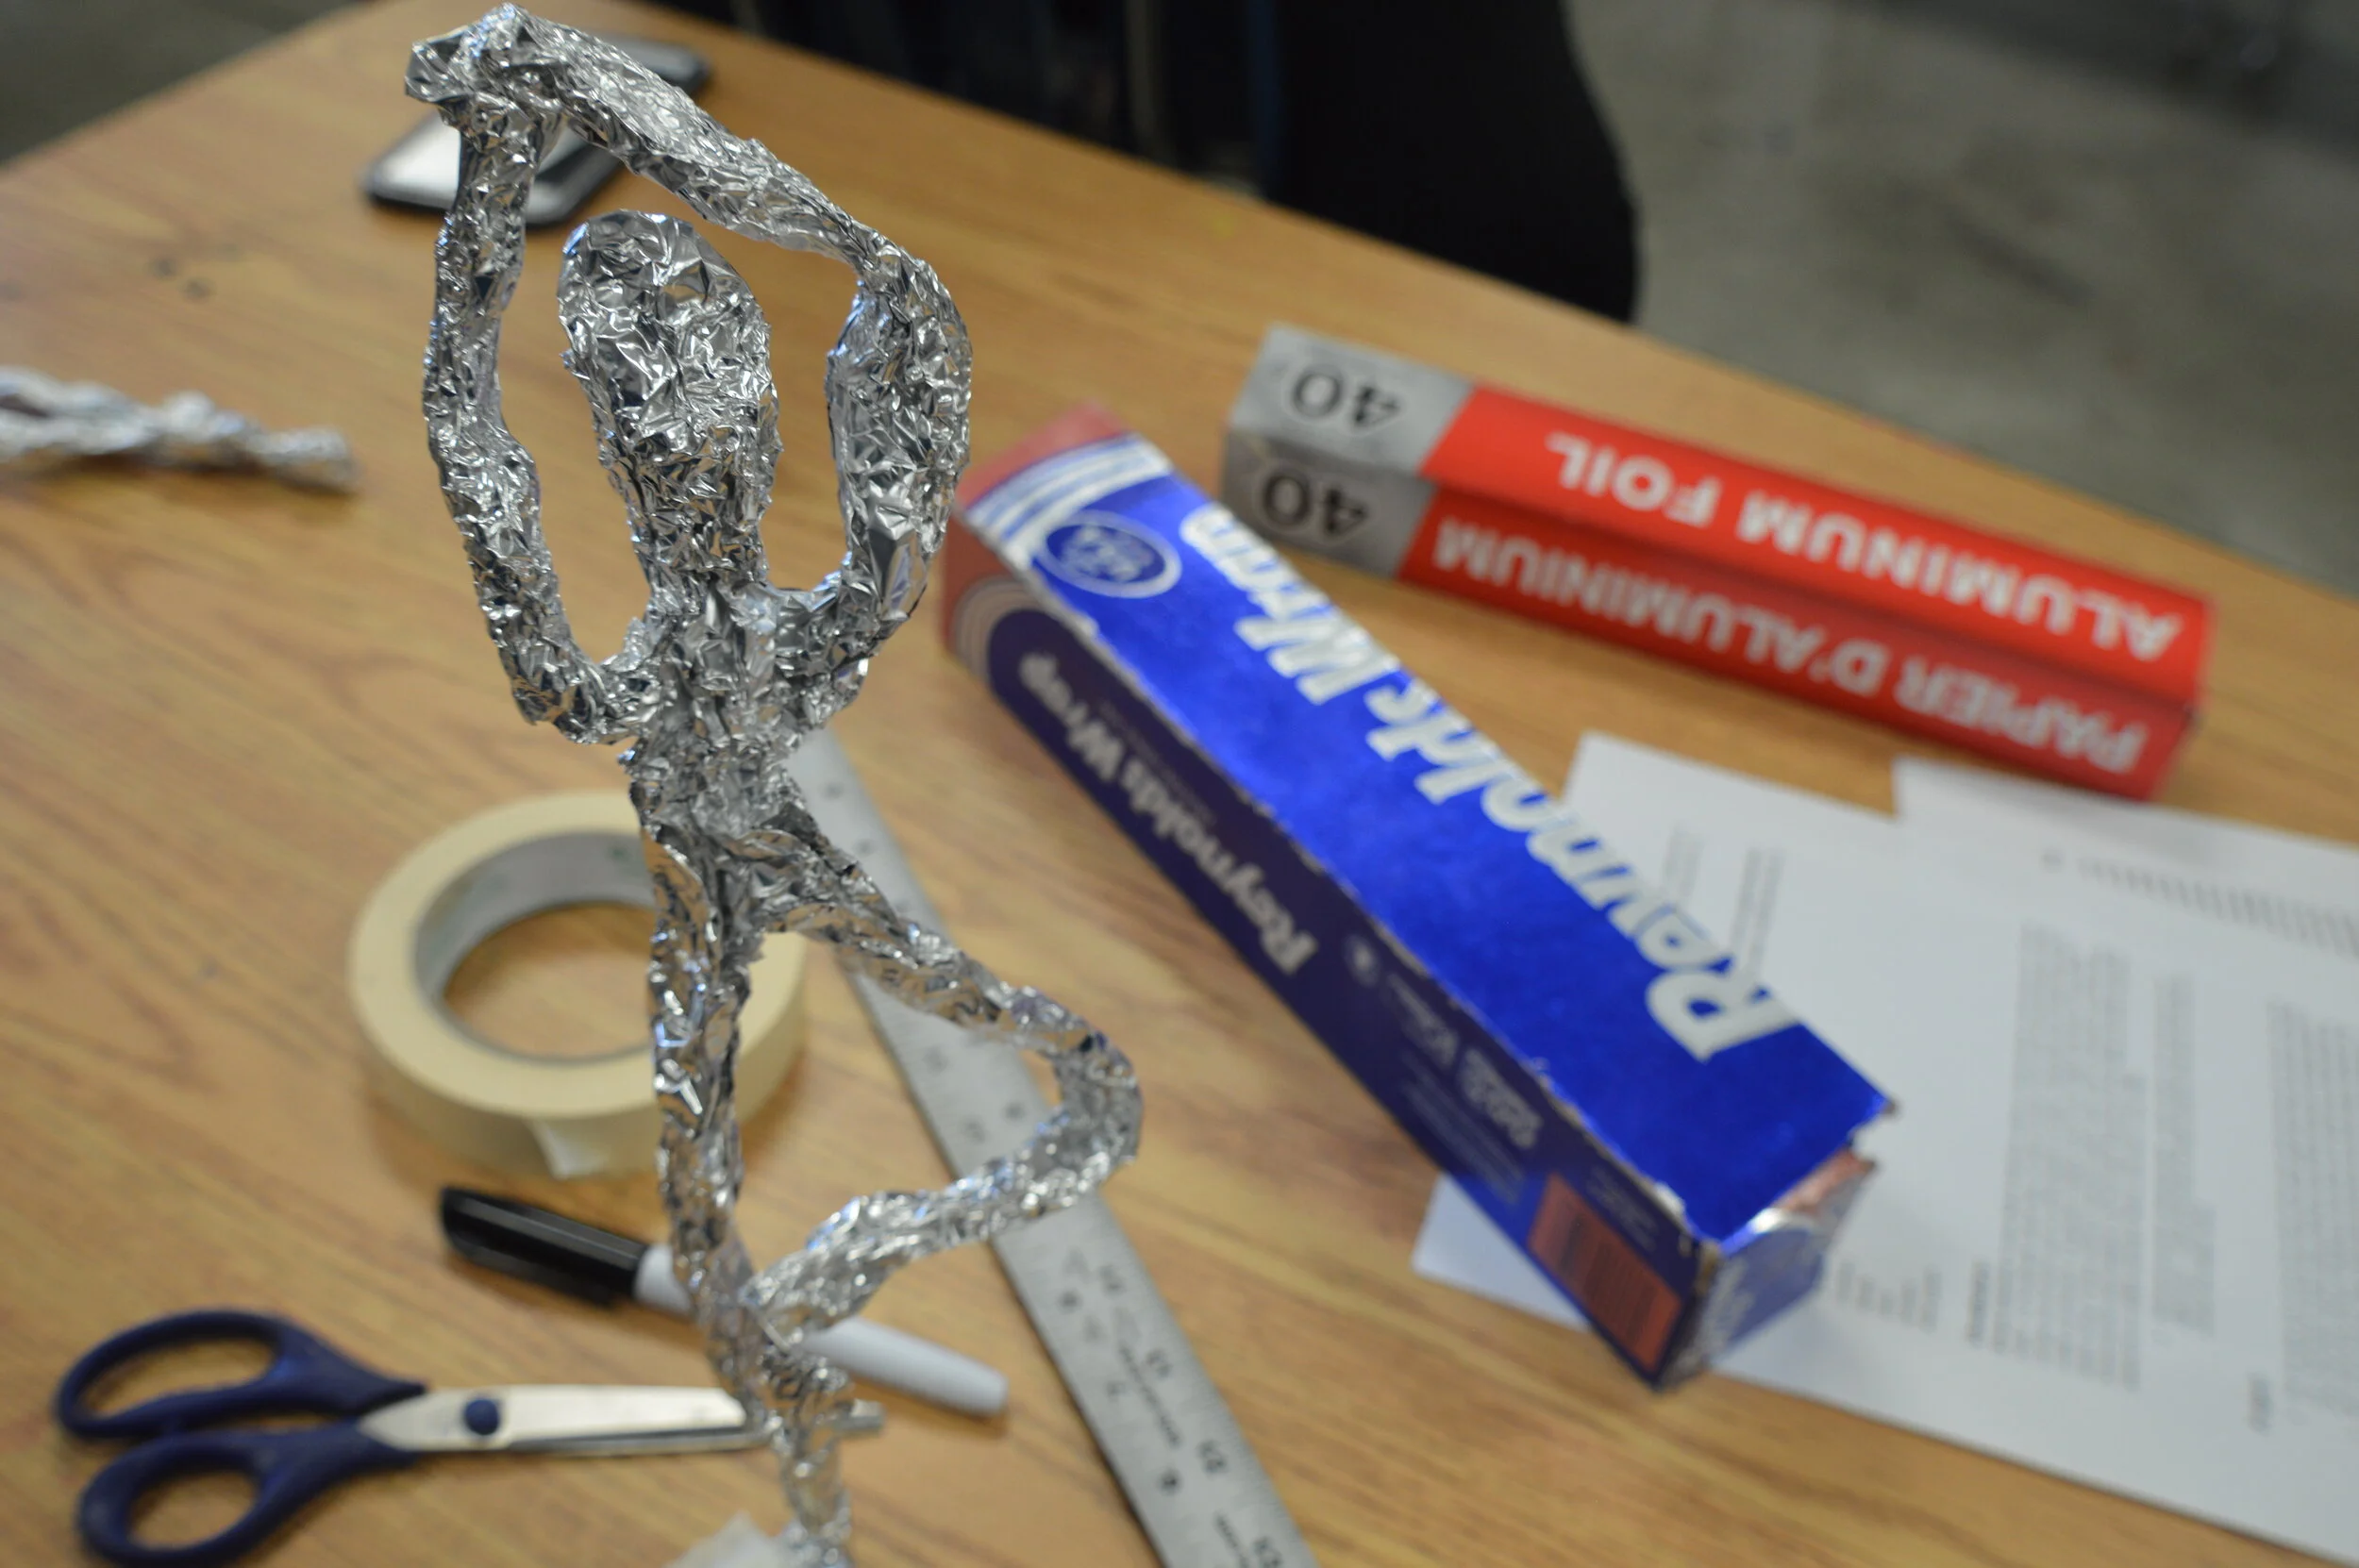

1. Divide your tinfoil into thirds on the top edge. (One mark at 4 inches, the second at 8 inches)
2. Take the ruler to the bottom edge of the foil and mark the half-way mark. (6 inches)
3. From the top, where you marked thirds, create 2 five inch vertical lines
4. From the bottom, at the half-mark, make a 5 inch vertical mark.

5. Cut along the lines you’ve created. (A parent/guardian can do this step for younger students)

6. Starting on one side on the bottom Pinch from the edges, inward, gathering the tin foil. Don’t pinch too hard. Now you have a leg! Do the same with the other side.
7. To make the arms, one at a time, crush the foil.
8. The remaining part, the head, you can crumple as well.
If you want to thicken and strengthen your sculpture you can add smaller strips of foil.
If you want to make your sculpture stand, flatten the bottom part of the leg to make feet. Add foil to lengthen and strengthen the feet.

Alberto Giacometti (1901 – 1966) was a Swiss artist based in Paris, known for his prints, paintings, and drawings, but was most famous for his sculptural work. He is considered one of the most important sculptors of the 20th century. His early works were inspired by Cubism and Surrealism. In the 1940’s Giacometti produced the thin figures for which he is most famous. His thin, skeletal, male and female nudes spoke to the angst that followed the second world war and are often cited as a metaphor for the human condition.